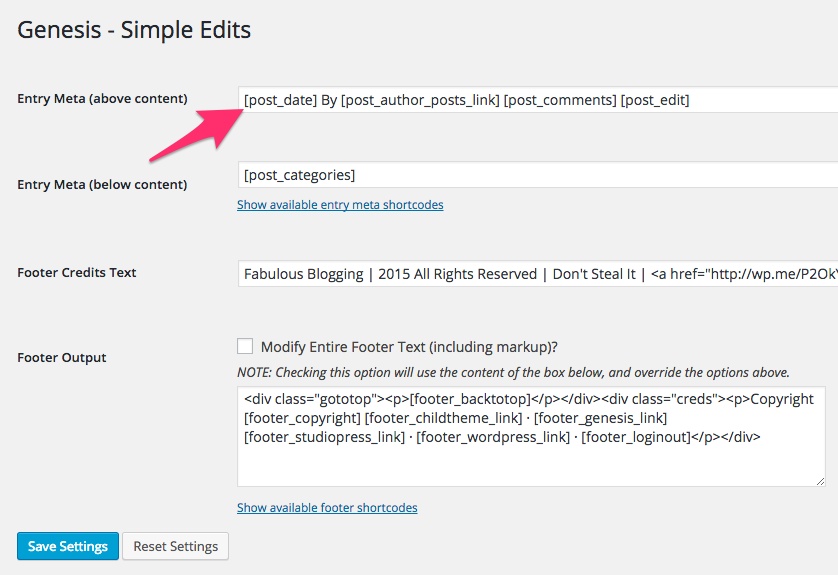
If you are using the Genesis Framework, the directions are simple.
- Install the Genesis Simple Edits plugin by going to PLUGINS > ADD NEW and use the search bar to find it.
- Install and activate it.
- Then go to GENESIS > SIMPLE EDITS and remove the following shortcode:

For anyone else using virtually any theme!
Before you begin, make sure you have the following tools installed:
- Google Chrome: You can simply go here and download the browser for your computer
- Jetpack: If you don’t know what Jetpack is, you can read about it here
- Activate the Custom CSS module within Jetpack: If your client has Jetpack, go to JETPACK > SETTINGS and make sure the CUSTOM CSS module is active
1. Open up the website in Google Chrome, find the date on the page and highlight it.
2. Right-click on it and choose Inspect Element. A lot of code will come up. On the left, if you run your cursor up and down over the code, you’ll see that different parts of the page get highlighted. What we’re trying to do is figure out what the date element is called for your client’s particular theme. So run your cursor over the code on the left until just the date is highlighted. Then look on the right, and you’ll see the name of the element that we need.
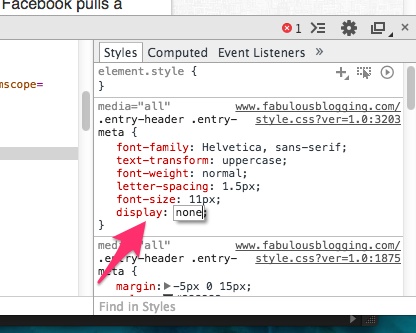
4. The best way to check if you’re on the right track, is to put your cursor in the code on the right, and type the display none command in CSS. This Google Chrome tool allows you to do this in a testing environment, without actually disturbing anything on your site. This is the command to hide something in css:
display:none;

5. When you do this, if you’ve grabbed the right element, then it’ll hide it on the page and you’ll see it happening live (but not really). When you’re done with this, go ahead and copy the name of the element because now we’re going to do it for real (again, the name of the element is on the right-hand side). For each theme, the name might be slightly different.

6. Now it’s time to put this command display:none; with the name of the element you copied into your stylesheet. You have three options depending on your theme:
- You can put it right into the main stylesheet, which is under APPEARANCE > EDITOR (least optimal)
- You can put it into a separate custom CSS editor module run by Jetpack APPEARANCE > EDIT CSS
- You can put it into a special custom CSS editor that’s built into the theme VARIES
Some themes have their own little spot for custom CSS so you don’t need the Jetpack module. ProPhoto for example (since a lot of my clients use this theme) has it under PROPHOTO > CUSTOMIZE > ADVANCED > CUSTOM CODE. Look around in your theme to see if there’s a place for custom CSS. If not, use the Jetpack CSS module that I had you activate.
The syntax for the code is this:
.element-name {
display: none;
}
Where it says .element-name, replace that with the element label that your theme gives (that you copied) For example, for genesis users the element name is:
.entry-header, .entry-meta {
display: none;
}
If you’re using a custom CSS box (either jetpack or the theme), just paste it on in and hit save. If you have to put it in the main stylesheet of the theme, you can tack it onto the bottom. That’s not a very neat way to do it, but it’ll get the job done. IMPORTANT NOTE! When the theme has an update, the custom CSS will be erased if you HAVEN’T used a custom CSS box, so make sure you have it saved.
Stick with the custom CSS boxes if you can. You’ll feel more comfortable!
