 If you’ve heard the buzz around the importance of “opt-in” features, but are intimidated at the idea of getting another email service or plugin, you can employ a very simple method of using MailChimp to gain the psychological benefit of an “opt-in”. In laymen’s terms, opt-ins are simply a way to entice people to sign up for your newsletter or email updates. It’s a thank you or rewards of sorts.
If someone is on the fence about signing up, usually a prize (even a small one) will push them over the edge. So here’s how you do it using your existing MailChimp subscription lists. I’ll break down each step into bite sized instructions, and there is a video tutorial at the end.
- Create an attractive image for your email signup on your sidebar.
- Customize your MailChimp sign up form.
- Create and upload the piece of content you want to offer (either through the WP dashboard or manually onto your server). If the file isn’t too large, you can directly upload it to MailChimp as well.
- Create a password protected page on WordPress and link your content on that page with an image or text (if you upload to Mailchimp, this step isn’t necessary).
- Go into the confirmation thank you email and welcome email templates in your MailChimp account and add text that directs your reader to the content with a link.
1. Create an attractive image for your email signup on your sidebar.
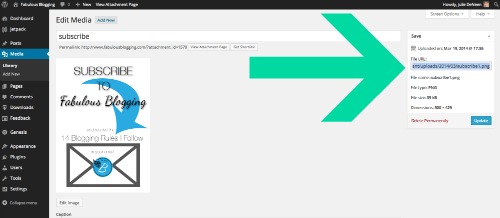
You can choose to use Canva, PicMonkey, or buy a subscribe button from me. Once you have the image as you like it, you can upload it into your media library and grab the FILE URL of the image.
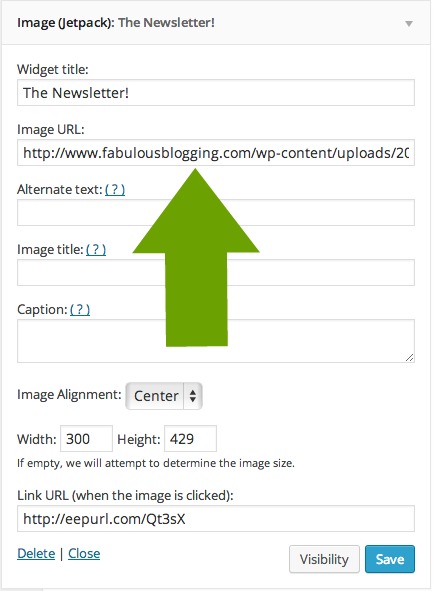
Once you have the image uploaded, add it to your sidebar widget area with a simple image widget. Paste the URL in the field that says IMAGE URL and hit save.
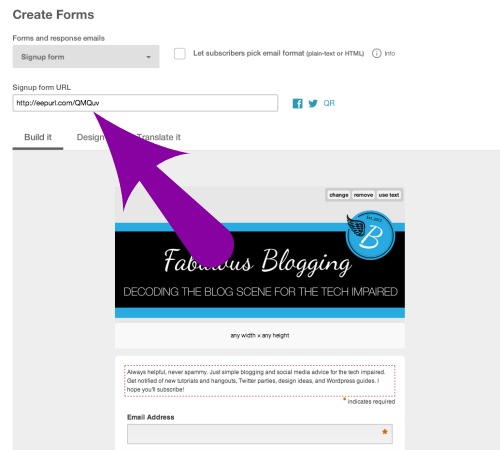
You see where it says LINK URL? That’s where it directs people once they’ve click on the image. In order to find that URL, we have to go into MailChimp and customize the signup form.
2. Customize your MailChimp sign up form.
- Log into MailChimp and click on the list you would like to work with.
- Then click on SignUp Forms.
- Click on General Forms.
- You can customize any part of the form by clicking on the edit button when you hover over the element.
- Once you have it as you like it, copy and paste the URL from MailChimp into your image widget on WordPress. Now your image is linked to the sign up.
3. Create a piece of content that you want to offer new subscribers.
It could be something as simple as a recipe, an archived post, or a free icon/product/e-book or slideshow. You can design a document, PDF, image, or anything that can be uploaded onto your server. Get creative!
Once you have the content ready to go, you can upload it one of several ways. If your content is a large file size, continue with the following tutorial. If, however, it’s just a one or two page PDF, you can skip down to step 5 and read the **Instructions** that are starred.
- If it’s less than 10mb, then go to your MEDIA LIBRARY and Click ADD NEW.
- If it’s more than 10mb, you’ll have to log into your server and upload it manually. The directory path will be wpcontent > uploads > 2014 > the month
- You’ll need the file URL of the image/content you’ve uploaded.
4. Create a password protected page on WordPress to feature your content.
You have the content uploaded and the URL. Now it’s time to go to PAGES> ADD NEW and create a page. Label it however you’d like, write a little note, and add an image. Click on the edit image button and link that image to your download (or alternatively, you can just link a piece of text). You should have the File URL copied to your clipboard from the first part of step #3.
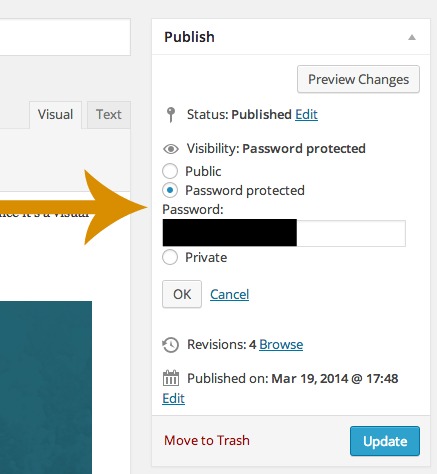
In the right hand corner of the edit screen where it says VISIBILITY, change it to Password protected and type a password. This will prevent anyone who’s stumbled on the page accidentally without signing up. If you’re familiar with the YOAST SEO plugin, you can also check off the “no index” box so search engines don’t index the page.
5. Put it all together and direct your new subscribers to the password protected page through the MailChimp Welcome Emails.
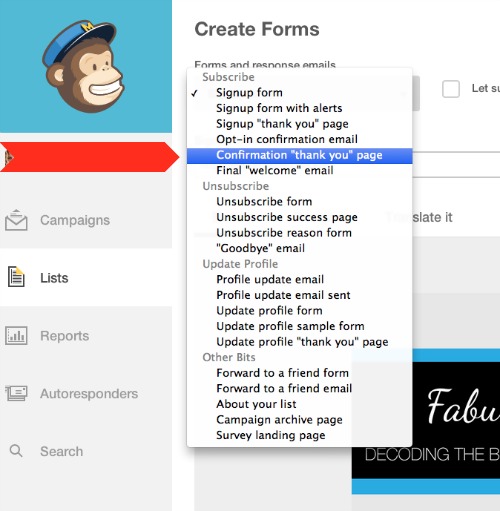
Go back to your MailChimp account and get to the SignUp forms. The two you want to edit are the confirmation thank you page and the final welcome email page.
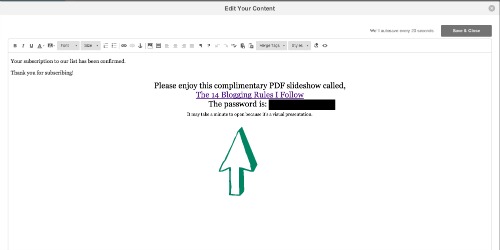
Click on each one and edit the content. Write a little thank you, add a link to your newly created password-protected page, and include the password in the description. **
That’s all there is to it!
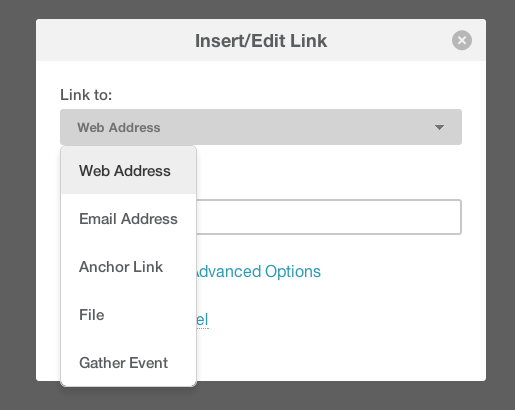
**If the content you are offering is not a large file, it’s possible to store it on Mailchimp’s servers rather than your own. This eliminates the need for a password protected page. In my case, the file was too large, but yours may not be. If so, all the steps are the same except step 4. After you’ve created your content, go directly to step five and customize your opt-in confirmation and welcome email. Instead of linking to a WordPress page, you are going to link directly to the file. Click on the link button in mailchimp, and change the dropdown to FILE. Upload your file and then you are all set!
