The sidebar on a website is prime real estate. For most of us, it holds our newsletter sign up form, our social media buttons, about profile, plus a host of other things like Ads, buttons, awards, etc. It is difficult to fit too much on the sidebar without it scrolling for days past a post right?
Today, I’m going to explain how to create unlimited variations of your sidebar so that you can display just what you need, where you need it. A few things to get out of the way first.
- No more double sidebars. I’ve seen so many blogs with sidebars on either side, and it’s just too much. There is no need!
- Consider adding a custom signature area to the bottom of your posts so people on mobile devices can access the most important stuff (social buttons and email signup).
- Take a good long look at your sidebar and decide if everything on it is REALLY necessary. Buttons and badges are nice, but often just add clutter.
Categorize items on your sidebar
First, I would like you to decide which items on your sidebar must be on every page, and which ones can appear in a few spots, but not all. Take everything on your sidebar and catalog it under….
- Must be on all posts
- Must be on certain posts (but not all)
- Must be on static pages (like the about, contact)
- Not sure
I’ll give you some examples:
Must be on all posts
- Sign up form
- Follow buttons
- Ads
- Featured Posts?
- Search
Must be on certain posts (but not all)
- Related posts per category
- Buttons or link up badges
Must be on static pages (like the about, contact)
- Photos
- Awards
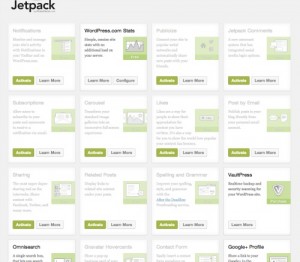
Download and Install the Jetpack plugin
Most WordPress websites come standard with Jetpack, but if yours didn’t, you can download it here. Once you have it uploaded and activated, it needs to be connected to a WordPress.com account in order to work. If you don’t have an account, it’s free and easy and takes two minutes. Go to WordPress.com and sign up. *It will automatically force you to sign up for a WordPress.com site, but don’t worry we won’t be using it“.
Activate the Widget Visibility module in Jetpack. It’s a good idea to keep all the ones you aren’t using, deactivated.
The Display/Hide Feature on your widgets
Now it’s time to hide and display the various widgets on your client’s sidebar. With all the widgets that must be displayed on all pages and posts, drag them up to the top of your sidebar widget area and leave them alone. They don’t need any rules added.
Related Posts Widget
Let’s say you want to display related posts on your sidebar that correspond with the post the viewer is reading. For example, if you are reading a post about social media, you would want to display some sort of button/image/list of related social media posts right?
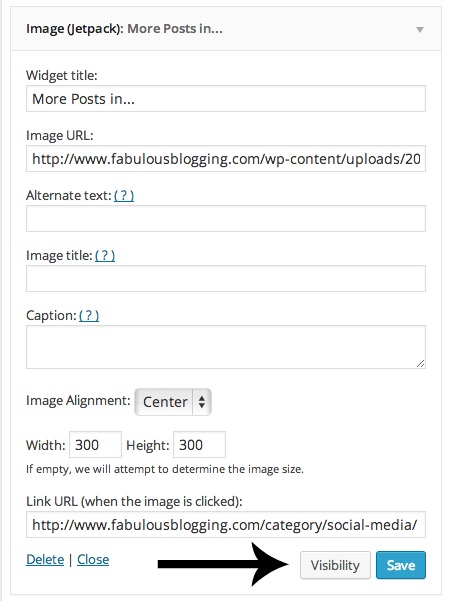
- First, I added the image with an image widget.
- Then I linked the image to a category archive (the URL is like this http://www.yourblog.com/category/yourcategory).
- Then I clicked on the button that says VISIBILITY.
- I chose the option, SHOW IF…and then picked CATEGORY = SOCIAL MEDIA.
Blog Hop Buttons
These are such a pain because, in order to participate in a link up, you must have the button displaying on your sidebar right? Well, here’s how you do it so it only shows up on those specific posts!
- Create a tag for your linkup.
- Make sure every post you write for the linkup is tagged with that exact tag.
- Upload the badge or button with a text widget and drag it to your sidebar.
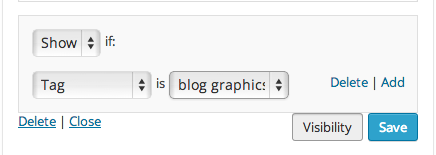
- Click on the visibility button and choose the option, SHOW IF…and then pick TAG = whatever your tag is called!

About Profile on your sidebar
This is a good example of something that needs to be on a lot of pages, with the exception of your About page (because it is redundant). To do this, you would choose the HIDE if option, rather than the SHOW option.
Then choose PAGES > ABOUT.
Awards
These awards can go on your about page, but don’t really need to be anywhere else. So add them to your sidebar and choose SHOW IF PAGE IS ABOUT.
Syndicated Badges
If you are featured on BlogHer, Mamalode, HuffPo or other places, upload these badges and have them display when the person is reading a featured post. You can create tags called HuffPo, Mamalode, etc. and create rules using the tag function.
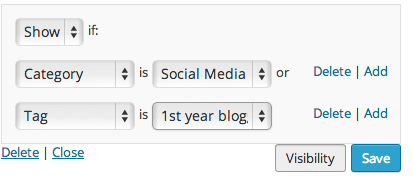
Now, let’s say you have a post that was featured on both BlogHer and HuffPo. In this case, you would create two rules. The first would be SHOW IF TAG=HUFFPO. Then hit save. Then, click the Add button and another rule box will show up. Choose SHOW IF TAG=BLOGHER.

Dynamic Ever-Changing Sidebars Relevant to the Content the User is Reading
Here are some other ideas that you can use to customize your site for the best viewing experience:
- If you have a multiple author site, create a rule so that the ABOUT avatar displays on the posts that are authored by that individual.
- If you want a widget to display on all posts, but not pages, choose the rule SHOW IF PAGES=POSTS page.
- You can also customize the archives and search pages using the PAGE=404 ARCHIVES or SEARCH ARCHIVES. You can have category and tag clouds on these pages, but not others (since they are probably in search mode if they are landing on these pages).


