With the death of the Google reader, Bloglovin’ is poised to be the primary way bloggers follow other bloggers. The platform is a fantastic and easy way to keep up with those writers you love. Here are step by step instructions for setting up your account and claiming your blog.
1. Sign up using your Facebook credentials or create a new username at BlogLovin.
2. Go to your email and verify your account.
3. It will ask you if you want to import your Google Reader blogs. If you don’t have a reader, you can skip this step.
4. It’ll ask you to start following 5 blogs and then it will redirect you to your newsfeed. It’s the same set up as facebook. All your followedblogs will show up. The list of your followed blogs will be on the left with numbers. That tells you how many posts are still unread in your feed.
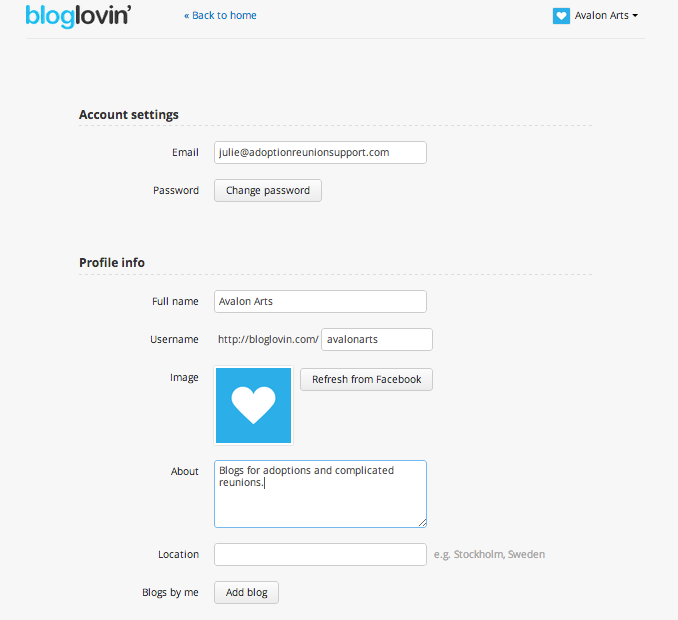
5. Up in the top right hand corner, click on your profile and hit view profile.
6. Edit the information and if you want a profile image, connect it to your facebook.
7. At the bottom of the profile page, there is a button that says, Add Blog. This is where you’ll claim your blog as your own.
8. Type in your blog URL and hit search.
9. When it finds your blog, you’ll need to insert some code into the meta – tag area of your blog. The best way to do this (if you have a self-hosted WordPress blog) is to download a plugin like Metadata or All in One SEO.
10. Bloglovin‘ does realize that many bloggers blog on WordPress.com or Blogger. IF you don’t have a metadata plugin, then you can simply copy and paste the code into a new blog post and hit publish. It can’t be a post that has already been published.
11. Copy the code and go to your blog (but leave that window open).
12. Under settings in your dashboard, go to where you have your metadata area (the option is labeled according to your plugin).
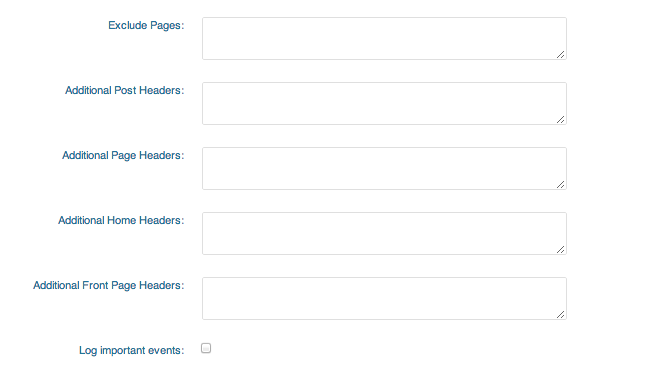
13. If you have the All in One SEO, you’ll see something like the photo below. If you have the metadata plugin, you’ll see a box that says Site-wide meta tags. The code goes in the box. For this plugin, put the code in the Additional Home Headers area.
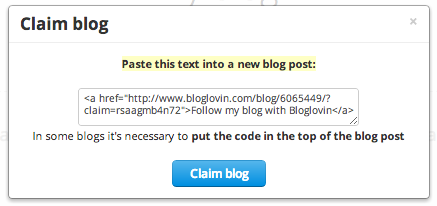
One note about the code bloglovin‘ gives you. This is what it looks like….
![]()
Where the >Follow my blog with Bloglovin</a> is, you can take out the part that says Follow my blog…. . Just make sure to leave the close tag ( </a> ). That way, nothing actually appears on your blog. It’s a hidden tag.
14. Now hit update, and then go back to your bloglovin page. Hit claim blog. It’ll find your hidden tag and verify your blog!
15. Then it will take you to your blog profile page where you can edit the information. If you would like a thumbnail, click on refresh thumbnail and within a few days, Bloglovin will put a screenshot of your blog!
16. Now when you go back to your profile, you’ll see your blog listed at the top.
Finally, you want to grab some Follow buttons to put on your sidebar. Simply go to the menu bar under your profile and click follow buttons. Grab the code, and paste it into a text widget on your sidebar. All done!
Now it’s time to find all your blogging friends. Type their blog URL in the search bar and if they are on bloglovin‘ – it will pull right up. Even if they don’t have a profile on bloglovin‘ you can still add their blog to your feed.


